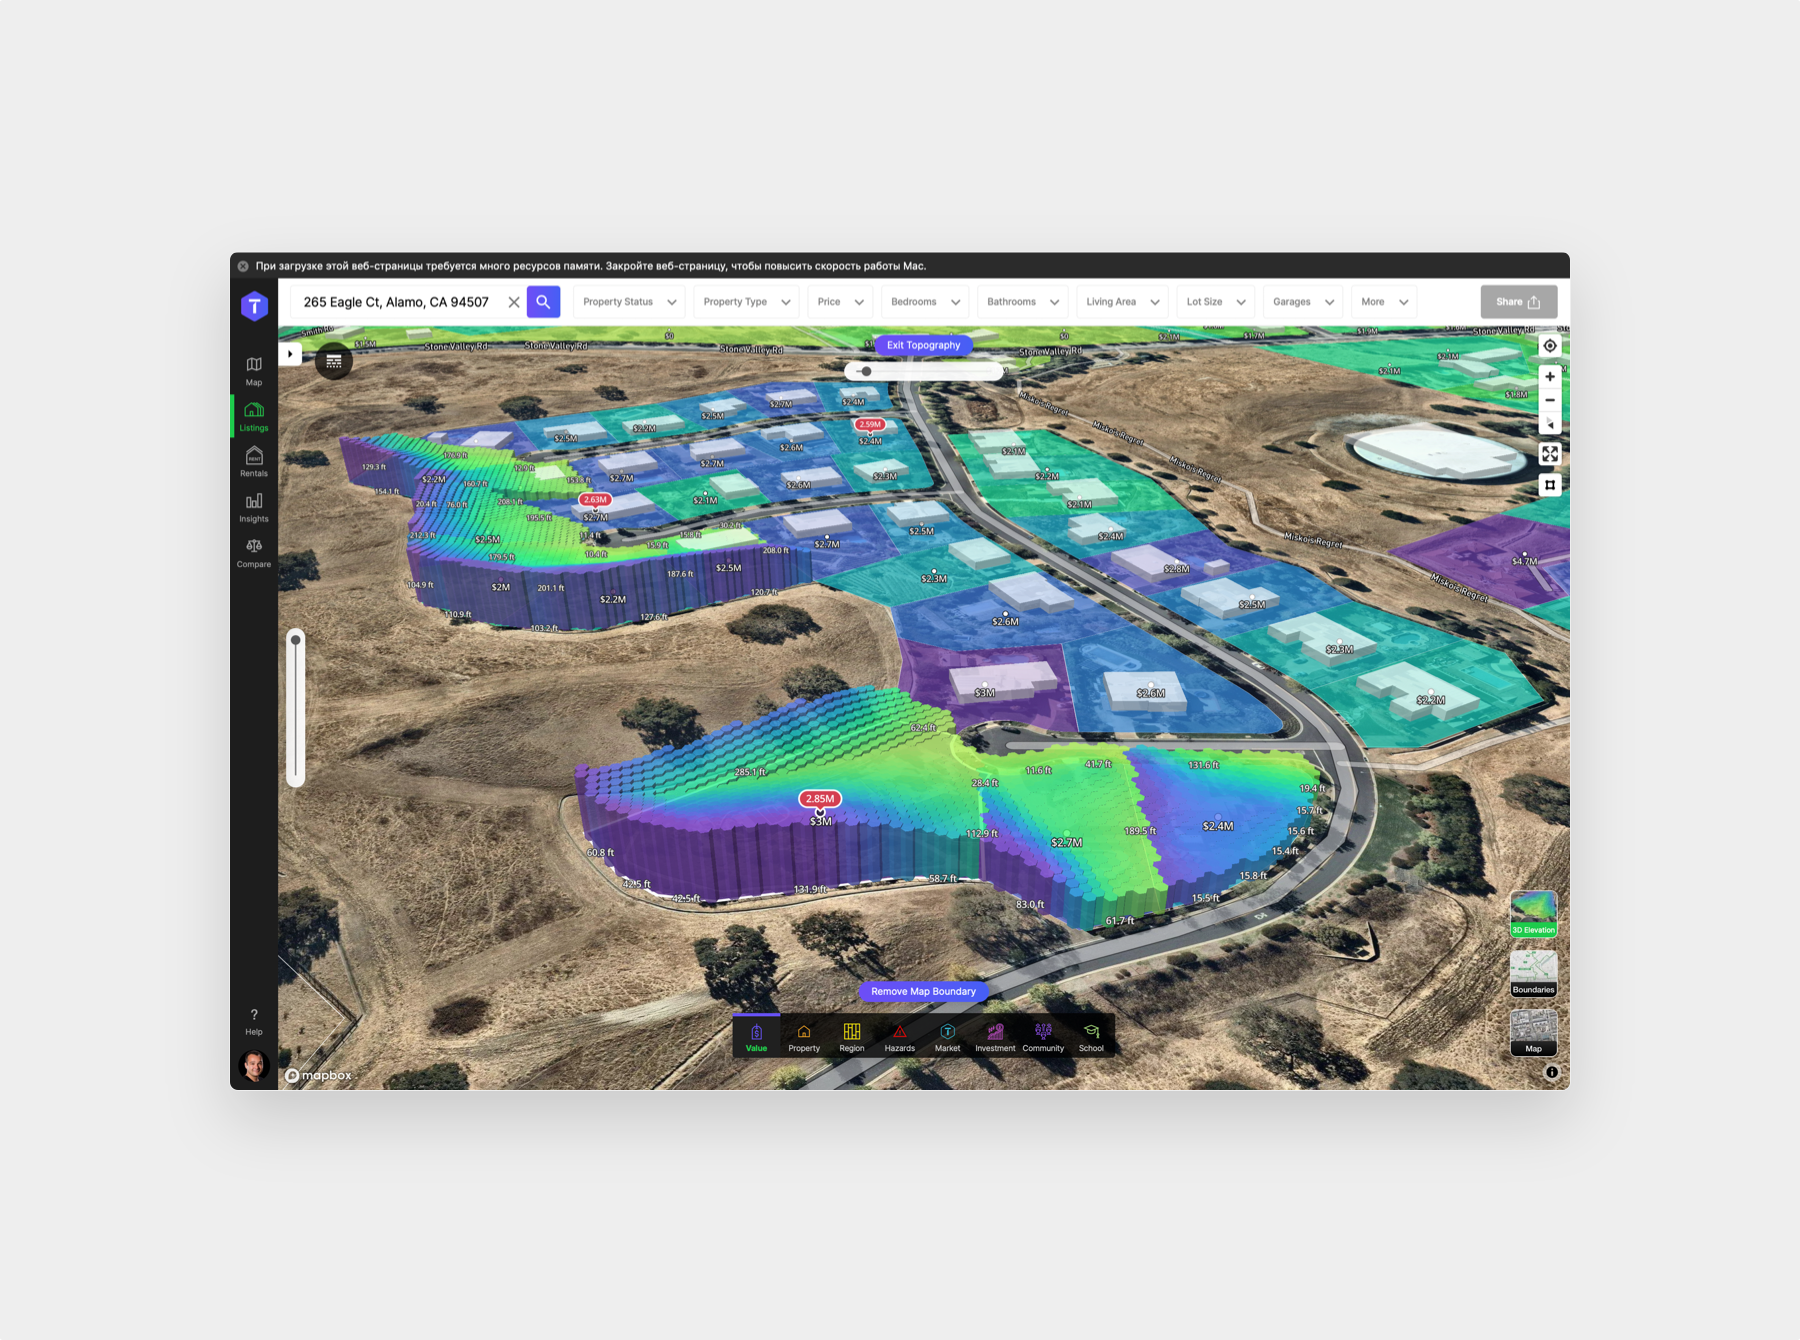
This tool allows you to virtually analyze the topography of parcels in a three dimensional format. You’re able to see the contour of the land portrayed by different height hexagons and also the 3D footprint of the building.
3D Topography Mode
To enter the 3D Topography Mode, first zoom into the map until you can see the parcel outlines and press the “3D Topography” button. If a property is already selected and its address is in your “Search Bar” then you’ll immediately see its 3D Topography. Alternatively you can click on one or more parcels and that will also load their topography. You can also click again to turn off the topography on any parcel.
3D Topography Controls
When you’ve selected the 3D Topography Tool two new map controls will appear. The Vertical Slider controls the map pitch and the horizontal slider controls the map rotation. With the keyboard shortcuts and the mouse gestures, rotate and pitch the map. More about this is discussed in the “Navigating TopHap’s Map” tutorial.
If you hover over the extruded hexagons then you will see a tooltip with the elevation of that point above sea-level.
Notice that when displaying the 3D Topography, TopHap shows elevations as relative to the selected parcel. What this means is that the lowest elevation will be at the map’s street level. Likewise the colors of the hexagons are also relative to the parcel as well. If you see the same color grouped over an area, will mean it’s a relatively flat part of the parcel.
If you click on multiple parcels, then the 3D Topography will be relative to all parcels in the group; however the colors will continue to visualize elevation relative to each parcel.


